
Lower back pain is one of the most common musculoskeletal complaints affecting millions of people worldwide. Whether it’s a dull ache after long hours at your desk, a sharp spasm after lifting something heavy, or chronic stiffness that greets you every morning — the root cause is almost always the same: weak core muscles, tight hip flexors, and poor spinal mobility.
Here’s what most people get wrong: they rest. They stop moving. And that makes it worse.
Research consistently shows that targeted, therapeutic exercises for lower back pain are more effective than bed rest, painkillers, or even passive treatments alone. Movement heals the spine. The right exercises decompress the lumbar vertebrae, strengthen the stabilising muscles, restore healthy blood flow to spinal discs, and retrain your nervous system to move without pain.
This guide gives you a physiotherapist-approved, step-by-step exercise programme — from beginner-friendly relief stretches to advanced core strengthening — designed specifically to treat and prevent lower back pain at its root.
Who This Guide Is For
This exercise programme is designed for people experiencing:
- Chronic lower back pain lasting more than 4 weeks
- Mild-to-moderate lumbar disc bulge or herniation
- Lower back stiffness and tightness
- Back pain caused by prolonged sitting or a sedentary lifestyle
- Muscular lower back pain from strain or overuse
- Postural lower back pain
Important: If you have severe nerve pain shooting down your leg, loss of bladder/bowel control, or pain following trauma, consult a physiotherapist before attempting any exercises.
Understanding the Anatomy: Which Muscles Actually Support Your Lower Back
Before diving into exercises, understanding the key structures gives you better body awareness and more effective training.
Muscles that stabilise the lumbar spine:
- Multifidus — deep spinal stabiliser; often the first muscle to weaken after a back injury
- Transverse Abdominis (TVA) — your deepest abdominal layer; acts like a natural back brace
- Erector Spinae — runs along the spine; supports upright posture
- Glutes (Gluteus Maximus & Medius) — critical for spinal load distribution; weak glutes = overloaded back
- Hip Flexors (Iliopsoas) — when tight, they pull the lumbar spine into excessive lordosis, causing pain
- Hamstrings — tight hamstrings tilt the pelvis and stress the lower back
A well-structured lower back exercise programme targets all of these — not just the back itself.
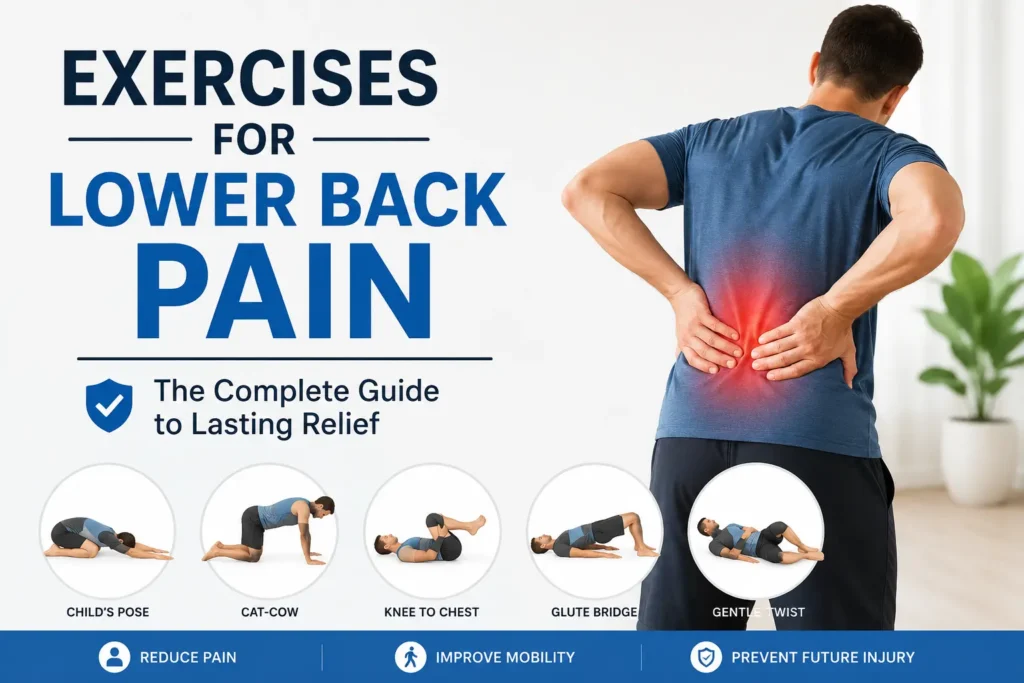
Phase 1: Acute Relief Exercises (Day 1–7)
These gentle movements reduce muscle spasm, restore joint mobility, and calm the nervous system. Perform these daily, twice a day, with slow and controlled breathing.
1. Knee-to-Chest Stretch (Lumbar Decompression)
Target: Lumbar vertebrae, deep spinal muscles Sets/Reps: Hold 30 seconds × 3 each side
How to do it:
- Lie flat on your back with knees bent, feet flat on the floor.
- Slowly bring one knee toward your chest using both hands.
- Hold gently, breathing deeply into your lower back.
- Feel the decompression along the lumbar spine.
- Switch sides and repeat.
Why it works: This movement creates traction in the lumbar spine, relieving disc pressure and reducing compressive pain.
2. Pelvic Tilt (Activating Transverse Abdominis)
Target: Deep core, lumbar stabilisers Sets/Reps: 15 reps × 3 sets
How to do it:
- Lie on your back, knees bent, feet flat, arms by your side.
- Gently flatten your lower back against the floor by tightening your abdominals.
- Hold for 5 seconds, then release.
- Do not hold your breath — breathe naturally throughout.
Why it works: The pelvic tilt is the foundation of lumbar rehabilitation. It re-activates the TVA and multifidus — the two muscles most likely to “switch off” after back pain.
3. Cat-Cow Stretch (Spinal Mobilisation)
Target: Full lumbar and thoracic spine, paraspinal muscles Sets/Reps: 10 slow repetitions × 2
How to do it:
- Start on hands and knees — wrists under shoulders, knees under hips.
- Cow: Inhale, drop your belly toward the floor, lift your head and tailbone.
- Cat: Exhale, round your spine toward the ceiling, tuck chin and tailbone.
- Move slowly, synchronising movement with breath.
Why it works: Cat-cow pumps synovial fluid into the spinal joints, hydrates intervertebral discs, and gently mobilises all segments of the lumbar spine.
4. Child’s Pose (Extended Lumbar Stretch)
Target: Lumbar extensors, gluteals, thoracolumbar fascia Sets/Reps: Hold 45–60 seconds × 3
How to do it:
- Kneel on the floor and sit back on your heels.
- Extend both arms forward on the ground.
- Rest your forehead gently on the floor (or a pillow).
- Breathe deeply, letting your lower back relax and lengthen.
Why it works: Child’s pose passively lengthens the posterior chain — the muscles most responsible for lower back tightness. It also activates the parasympathetic nervous system, reducing pain sensitivity.
5. Supine Hip Flexor Stretch
Target: Iliopsoas, lumbar lordosis correction Sets/Reps: Hold 30 seconds × 3 each side
How to do it:
- Lie on your back at the edge of a bed or table.
- Pull one knee firmly to your chest.
- Let the other leg hang off the edge, relaxing toward the floor.
- Feel the stretch deep in the front of the hanging hip.
Why it works: Tight hip flexors are the single most overlooked cause of chronic lower back pain. This stretch directly addresses anterior pelvic tilt and lumbar hyperextension.
Phase 2: Core Stabilisation Exercises (Week 2–4)
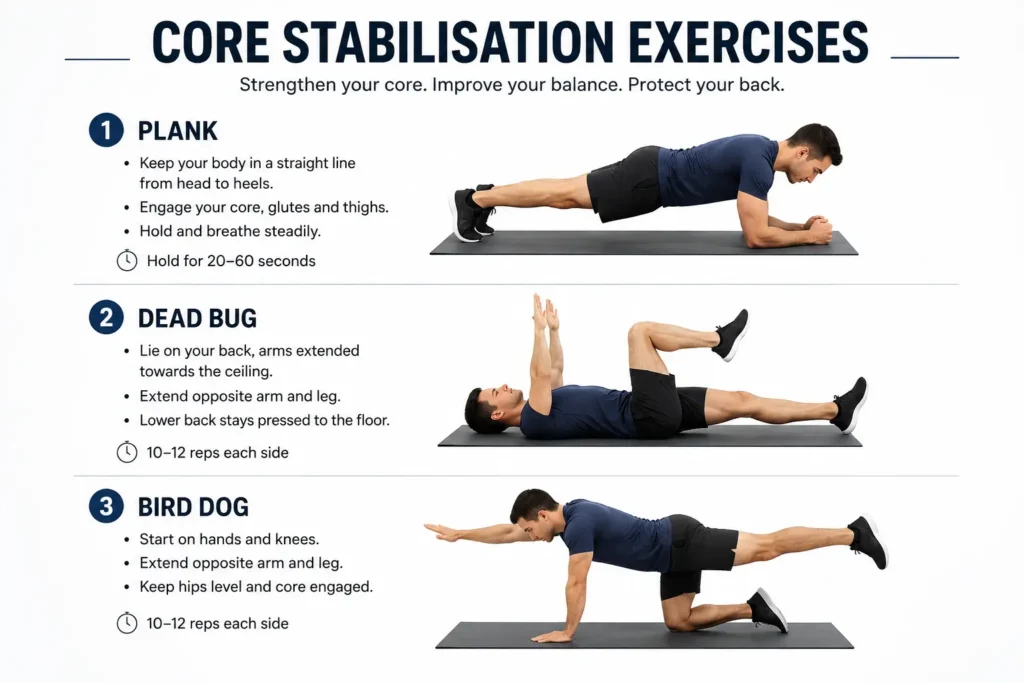
Once acute pain settles, you need to rebuild the muscular support system of the spine. These exercises train stability and endurance — not just strength.
6. Dead Bug Exercise
Target: TVA, multifidus, lumbar stability Sets/Reps: 10 reps each side × 3
How to do it:
- Lie on your back, arms pointing straight toward the ceiling, knees bent at 90°.
- Press your lower back firmly into the floor (maintain this throughout).
- Slowly lower your right arm overhead and left leg toward the floor simultaneously.
- Stop just before your back lifts off the floor. Return and alternate.
Why it works: The dead bug is considered the gold standard of lumbar stabilisation. It trains your core to resist spinal extension — exactly what’s needed to protect the lower back during daily activities.
7. Bird Dog
Target: Multifidus, glutes, erector spinae, anti-rotation stability Sets/Reps: 10 reps each side × 3
How to do it:
- Start on hands and knees in a neutral spine position.
- Slowly extend your right arm forward and left leg backward simultaneously.
- Hold for 3 seconds, keeping hips perfectly level.
- Return slowly and alternate.
Why it works: The bird dog trains the multifidus — the deepest spinal stabiliser — while building co-activation between the glutes and core. It is one of the most evidence-backed exercises for chronic lower back pain.
8. Glute Bridge
Target: Gluteus maximus, hamstrings, lumbar extensors Sets/Reps: 15 reps × 3
How to do it:
- Lie on your back, knees bent, feet flat and hip-width apart.
- Press through your heels, squeeze your glutes, and lift your hips toward the ceiling.
- Hold the top position for 2 seconds — do not hyperextend your lower back.
- Lower slowly and repeat.
Why it works: Weak glutes force the lower back to overwork. The glute bridge directly corrects this imbalance. Strong glutes are your spine’s best friend.
9. Side-Lying Clamshell
Target: Gluteus medius, hip external rotators Sets/Reps: 15 reps × 3 each side
How to do it:
- Lie on your side with knees bent and stacked, hips slightly forward.
- Keeping feet together, rotate your top knee upward like a clamshell opening.
- Do not let your pelvis rock backward.
- Lower slowly and repeat.
Why it works: Weak gluteus medius leads to lateral pelvic drop — a major contributor to lumbar stress. This exercise is essential for anyone with lower back pain related to poor hip control.
10. Modified Plank (Knee Plank)
Target: TVA, erector spinae, shoulder stabilisers Sets/Reps: 3 × 20–30 second holds
How to do it:
- Start on hands and knees, then lower to forearms.
- Extend knees back or keep them down (modified).
- Form a straight line from head to knees/feet.
- Brace your core — do not let your hips sag.
Why it works: The plank builds isometric endurance in all the spinal stabilisers simultaneously. It is far safer than sit-ups or crunches for people with lower back pain.
Phase 3: Functional Strength & Long-Term Prevention (Week 4 Onwards)
This phase rebuilds true functional strength and prepares your spine for the demands of real life.
11. Romanian Deadlift (Hip Hinge Pattern)
Target: Hamstrings, glutes, erector spinae, lumbar endurance Sets/Reps: 10 reps × 3 (use bodyweight or light dumbbells)
How to do it:
- Stand hip-width apart, slight bend in knees.
- Push your hips backward while lowering your torso — keep the spine neutral.
- Feel a deep stretch in your hamstrings.
- Drive through your heels and squeeze glutes to stand tall.
Why it works: Learning to hinge at the hip (not the spine) is the most important movement pattern for lower back protection. This exercise trains exactly that.
12. Wall Sit with Back Flat
Target: Quadriceps, glutes, lumbar stabilisers Sets/Reps: 3 × 30 seconds
How to do it:
- Stand with your back flat against a wall.
- Slide down until thighs are parallel to the floor (or as far as comfortable).
- Press your lower back firmly into the wall.
- Hold and breathe.
Why it works: Builds lower limb endurance while reinforcing neutral spine positioning — critical for long-term lumbar health.
13. Standing Hip Abduction with Band
Target: Gluteus medius, TFL, lateral lumbar stabilisers Sets/Reps: 15 reps × 3 each side
How to do it:
- Place a resistance band around your ankles.
- Stand tall, holding a wall for balance.
- Lift one leg directly out to the side, keeping hips level.
- Slowly lower and repeat.
14. Thoracic Rotation Stretch
Target: Thoracic spine, obliques, lumbar decompression Sets/Reps: 10 each side × 2
How to do it:
- Sit on a chair, cross arms over chest.
- Rotate your upper body slowly to the right, keeping hips still.
- Hold 2 seconds at end range. Return and repeat to the left.
Why it works: A stiff thoracic spine forces the lumbar spine to rotate more than it should — leading to micro-trauma and pain. Thoracic mobility directly reduces lumbar load.
Lower Back Exercise Programme: Weekly Schedule
| Day | Focus |
| Monday | Phase 2 Core Stability (Dead Bug, Bird Dog, Plank) |
| Tuesday | Phase 1 Stretches + Hip Flexor Routine |
| Wednesday | Phase 3 Functional Strength |
| Thursday | Active Recovery — Walking 20 mins + Cat-Cow |
| Friday | Phase 2 Core + Glute Bridge |
| Saturday | Full programme (light) |
| Sunday | Rest or gentle yoga/walking |
5 Common Mistakes That Make Lower Back Pain Worse
- Doing sit-ups and crunches — These create excessive disc pressure. Replace with dead bugs and planks.
- Stretching without strengthening — Flexibility without stability = recurrence. You need both.
- Ignoring the glutes — The glutes protect the lumbar spine. Neglecting them is the #1 oversight.
- Holding your breath during exercises — This spikes intra-abdominal pressure and strains the spine.
- Expecting overnight results — Rehabilitation takes 4–8 weeks of consistent effort. Trust the process.
When to See a Physiotherapist for Lower Back Pain
Exercises work best when guided by a professional. Book a physiotherapy consultation if:
- Your pain has lasted more than 6 weeks
- Pain radiates down your leg (possible nerve involvement)
- You experience numbness or tingling in the legs or feet
- Your pain worsens with specific exercises
- You have had previous spinal surgery or injury
A qualified physiotherapist will assess your posture, movement patterns, muscle imbalances, and neurological signs — then build a personalised programme tailored to your exact diagnosis.